


Elementor 3.11 includes new features that will allow you to customize the design and display of your ads, improve your workflow and experience of your visitors.
This version allows you to improve the design of your website with a number of features you have requested. With the new looped carousel, you can improve the design of your website by displaying your articles, custom items or products in an elegant and eye-catching looped carousel format.
In addition, you can streamline your workflow by copying elements from one website to another via the new Copy & Paste feature between websites.
Contents
Display your dynamic ads in a carousel of your choice with the new loop carousel [Reserve for Elementor Pro]
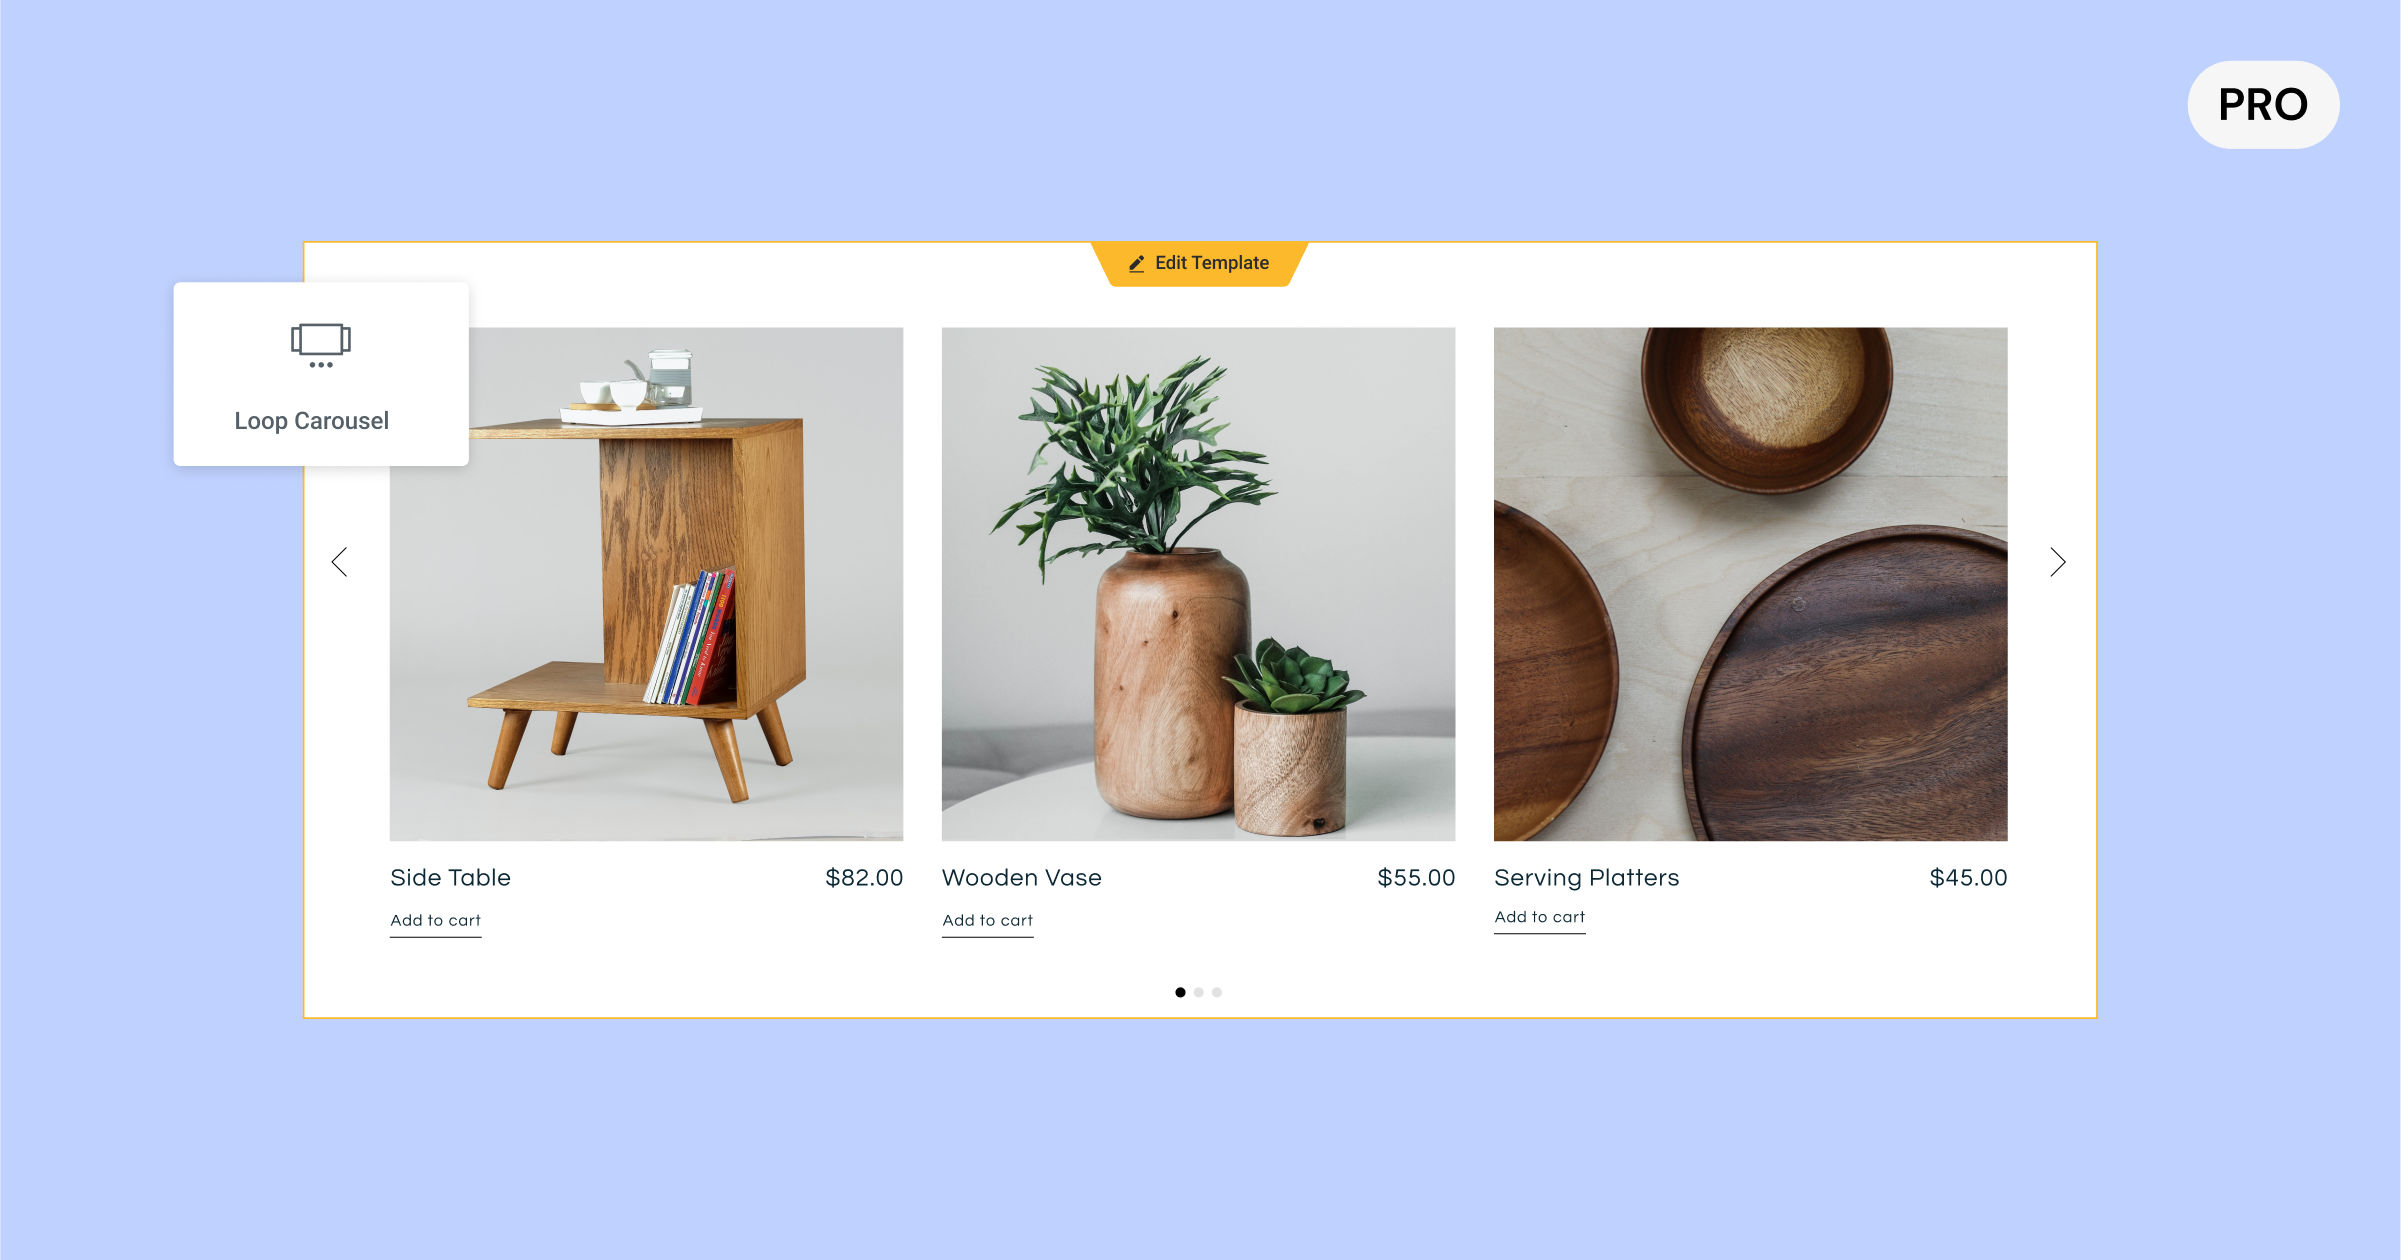
The new Loop Carousel widget extends the capabilities of the Loop Builder, launched for the first time in Elementor 3.8, and allows you to place a Carousel Loop anywhere on your website. With the Loop Carousel, you can display lists of your articles, custom items or products in an infinite loop carousel format, instead of a grid.
The creation of your own custom loop carousel requires the creation (or use) of a main element model, the choice of a query to determine the content to be displayed and the design of the carousel, in the same way as you would conceive any other carousel in Elemenor.
I explain everything here: https://blogaddict.fr/how-create-loop-elementor/
Design of the main element model for your carousel
When you drag the Loop Carousel widget into the editor, you are invited to create a template. You can choose to create an on-site one by clicking on the button in the editor or in the widget pane, or choose a template you have already created. You can also create a new template by going into the theme builder and adding a new loop element.
Design your main element model as you wish, using all available widgets, adjusting their order, size, layout and many more things to meet your design needs. The widgets you use can be used to improve the design of your model, or they can be dynamic and fill according to the content you assign them with dynamic tags.
Pro Council: To ensure the consistency of your website and speed up your workflow, you can use the same main element model in your loop grid and loop carousel by choosing the same model.
Determine the content to display
In the Request tab, you can choose the content you want to display in the loop carousel. The content you have chosen will display dynamically in each card of the carousel. At this point, you can choose to display your articles, custom items, products, landing pages, etc. You can then use the Include/Exclude button to select the content you want to display based on the different taxonomies of your content.
Once you have chosen the content source you want to include in your loop carousel, you can adjust additional settings to display your lists as you wish, by order, date, title, menu order and last modification, among others.
Personalization of the carousel
To customize the looped carousel, you can set the number of cards you want to display at once and use all the style options available in the other carousel widgets, including automatic playback, scroll speed, overflight pause and infinite scrolling.
In addition, you can take advantage of all the advanced carousel settings to include motion effects, add a border, mask, and more.
Note: Elementor 3.11 also includes an upgrade to the Swiper library infrastructure from version 5.3.6 to version 8.4.5. The Swiper library is associated with carousel settings, and will allow more style and parameters for carousels in future versions. This experience will be active by default on new websites. If you have an existing website that you want to activate for this experience, go to Elementor → Settings → Features and enable « Upgrade Swiper Library » Before enabling this experience, make sure to save your website and test it in a trial environment.
If you're interested, I made a tutorial on the creation of filters for WooCommerce via loops.
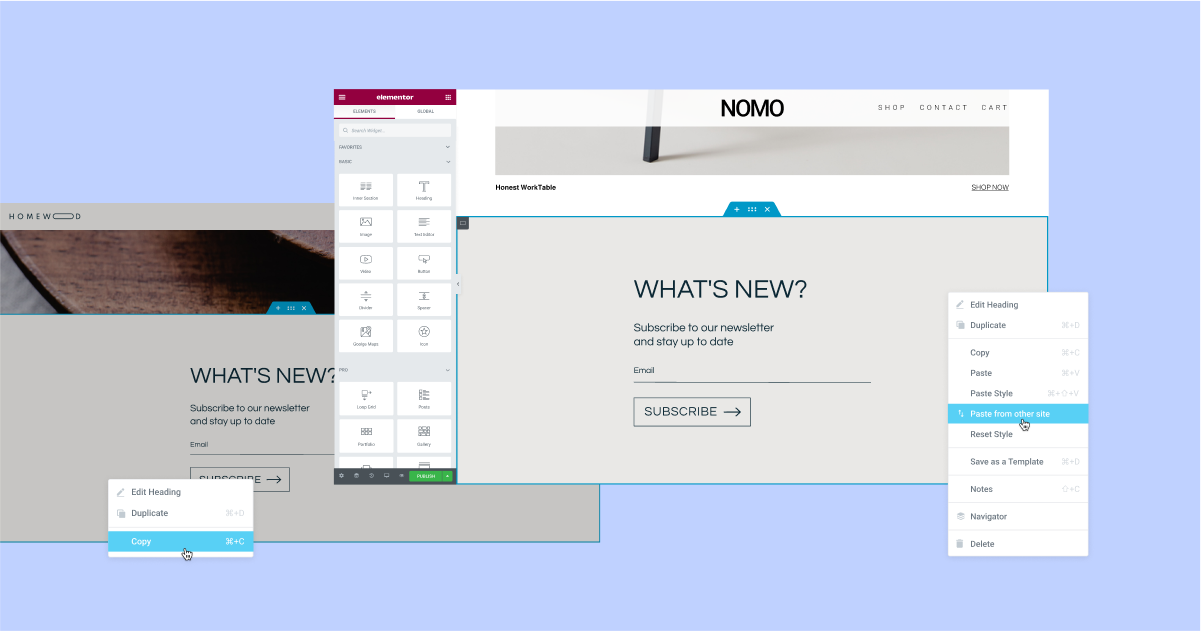
Copy and paste instantly between the editor of a website and that of another website
In other words, it is now possible to copy an element of a site A to a site B. Very practical.
Have you designed an item on one website and want to use it on another? You can now use the new Copy & Paste feature between websites. This will help you speed up your workflow by avoiding creating a JSON file for an item you want to copy, export and import to another website.
With this update, you can copy any element of the editor of a website using the Copy command (CMD/CTRL + C, or by right-clicking the mouse button on the item and choosing Copy) and paste it into the editor of another website by right clicking the mouse button where you want to paste it in the editor and choosing « Paste from another site » You will then be asked to click on CMD/CTRL + V to confirm that you want to paste the item.
To improve the workflow and maintain the consistency of the design of your website, the elements you paste from another website will adopt the global styles (colors and fonts) of the target website in which you paste them. Thus, you do not need to adapt them yourself to your website.
Note: To use Copy & Paste between websites, both websites must be on Elementor version 3.11 or higher. In addition, locally hosted videos and images will not be copied. You will need to download the image or video to the target site yourself.
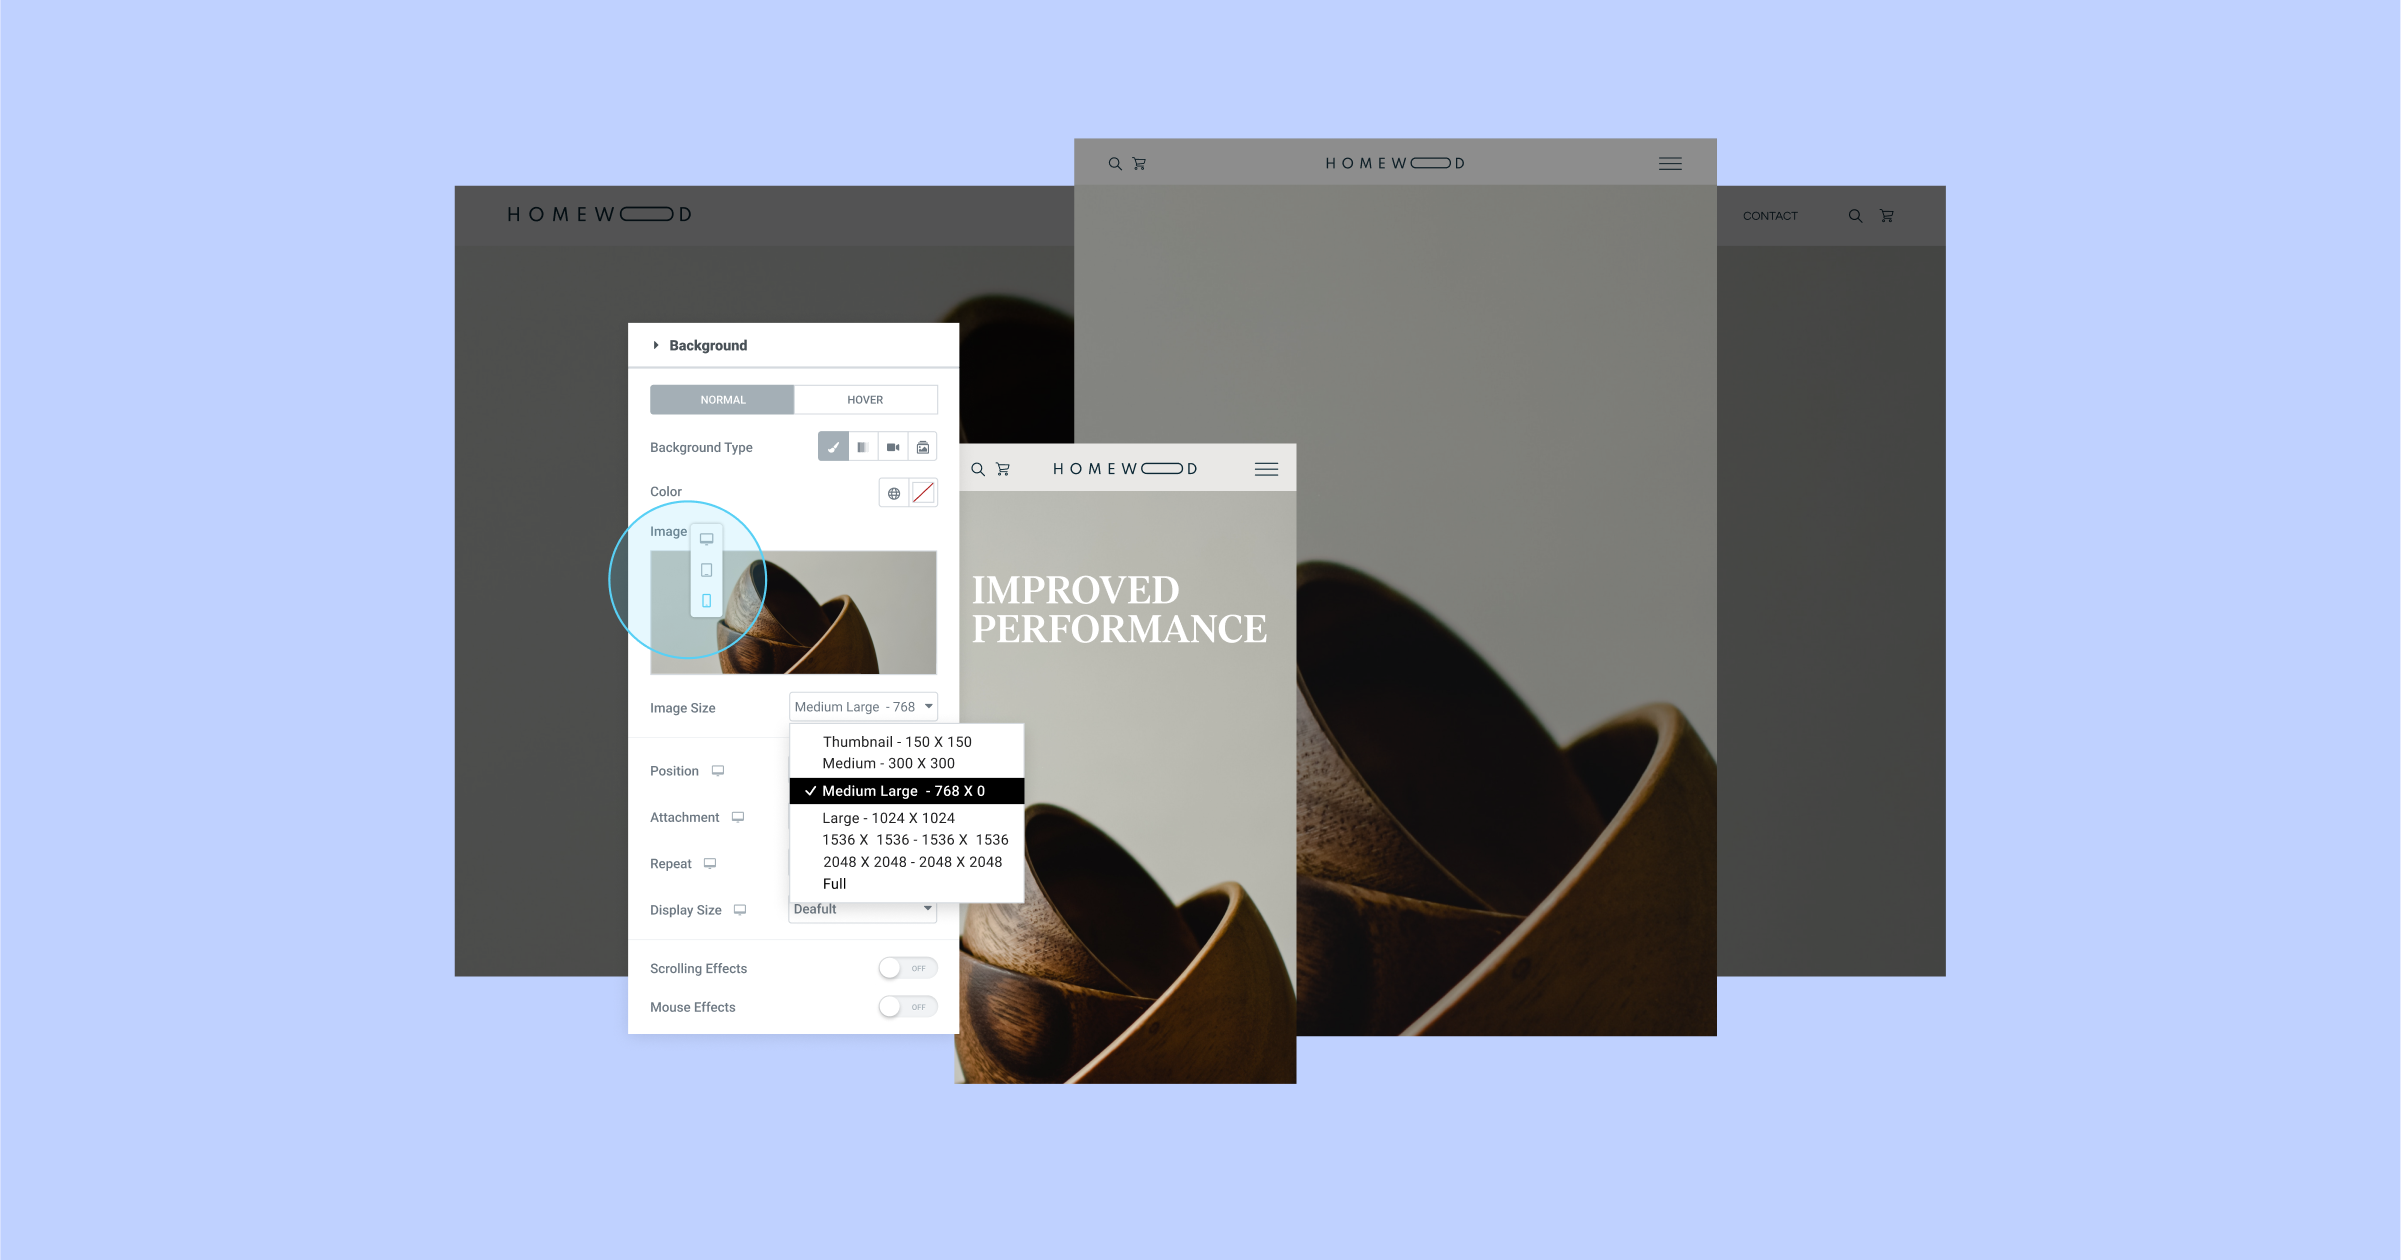
Adjust the size of your background images according to the device to improve the loading time of the website
Good news for the performance of our sites. It is now possible to adjust the size of our images placed in the background for each device. Therefore, the speed gain ensured.
The size of the images can have a significant impact on the appearance and performance of your website. Choose a size too small and you may not get the best resolution on large screens, or an image too large and you may have a negative impact on your performance, especially on small devices.
Each image downloaded on WordPress is cut into different sizes (image resolution), including: thumbnail, medium, large medium, full, etc. This allows you to adjust the size of the image at different breaking points.
With Elementor 3.11, you can adjust any background image size in a reactive way, allowing you to choose larger images for the desktop and smaller images for the mobile and improve the performance of your website, without compromising its appearance.
As part of this update, the other size control in the background image settings, which controls the CSS parameters of the image size (Auto, Cover, Container, and Custom) has been renamed « Display Size » (size of display).
[Reserved to Elementor Pro] Plan your pop-up windows for a specific time range with the new advanced rule
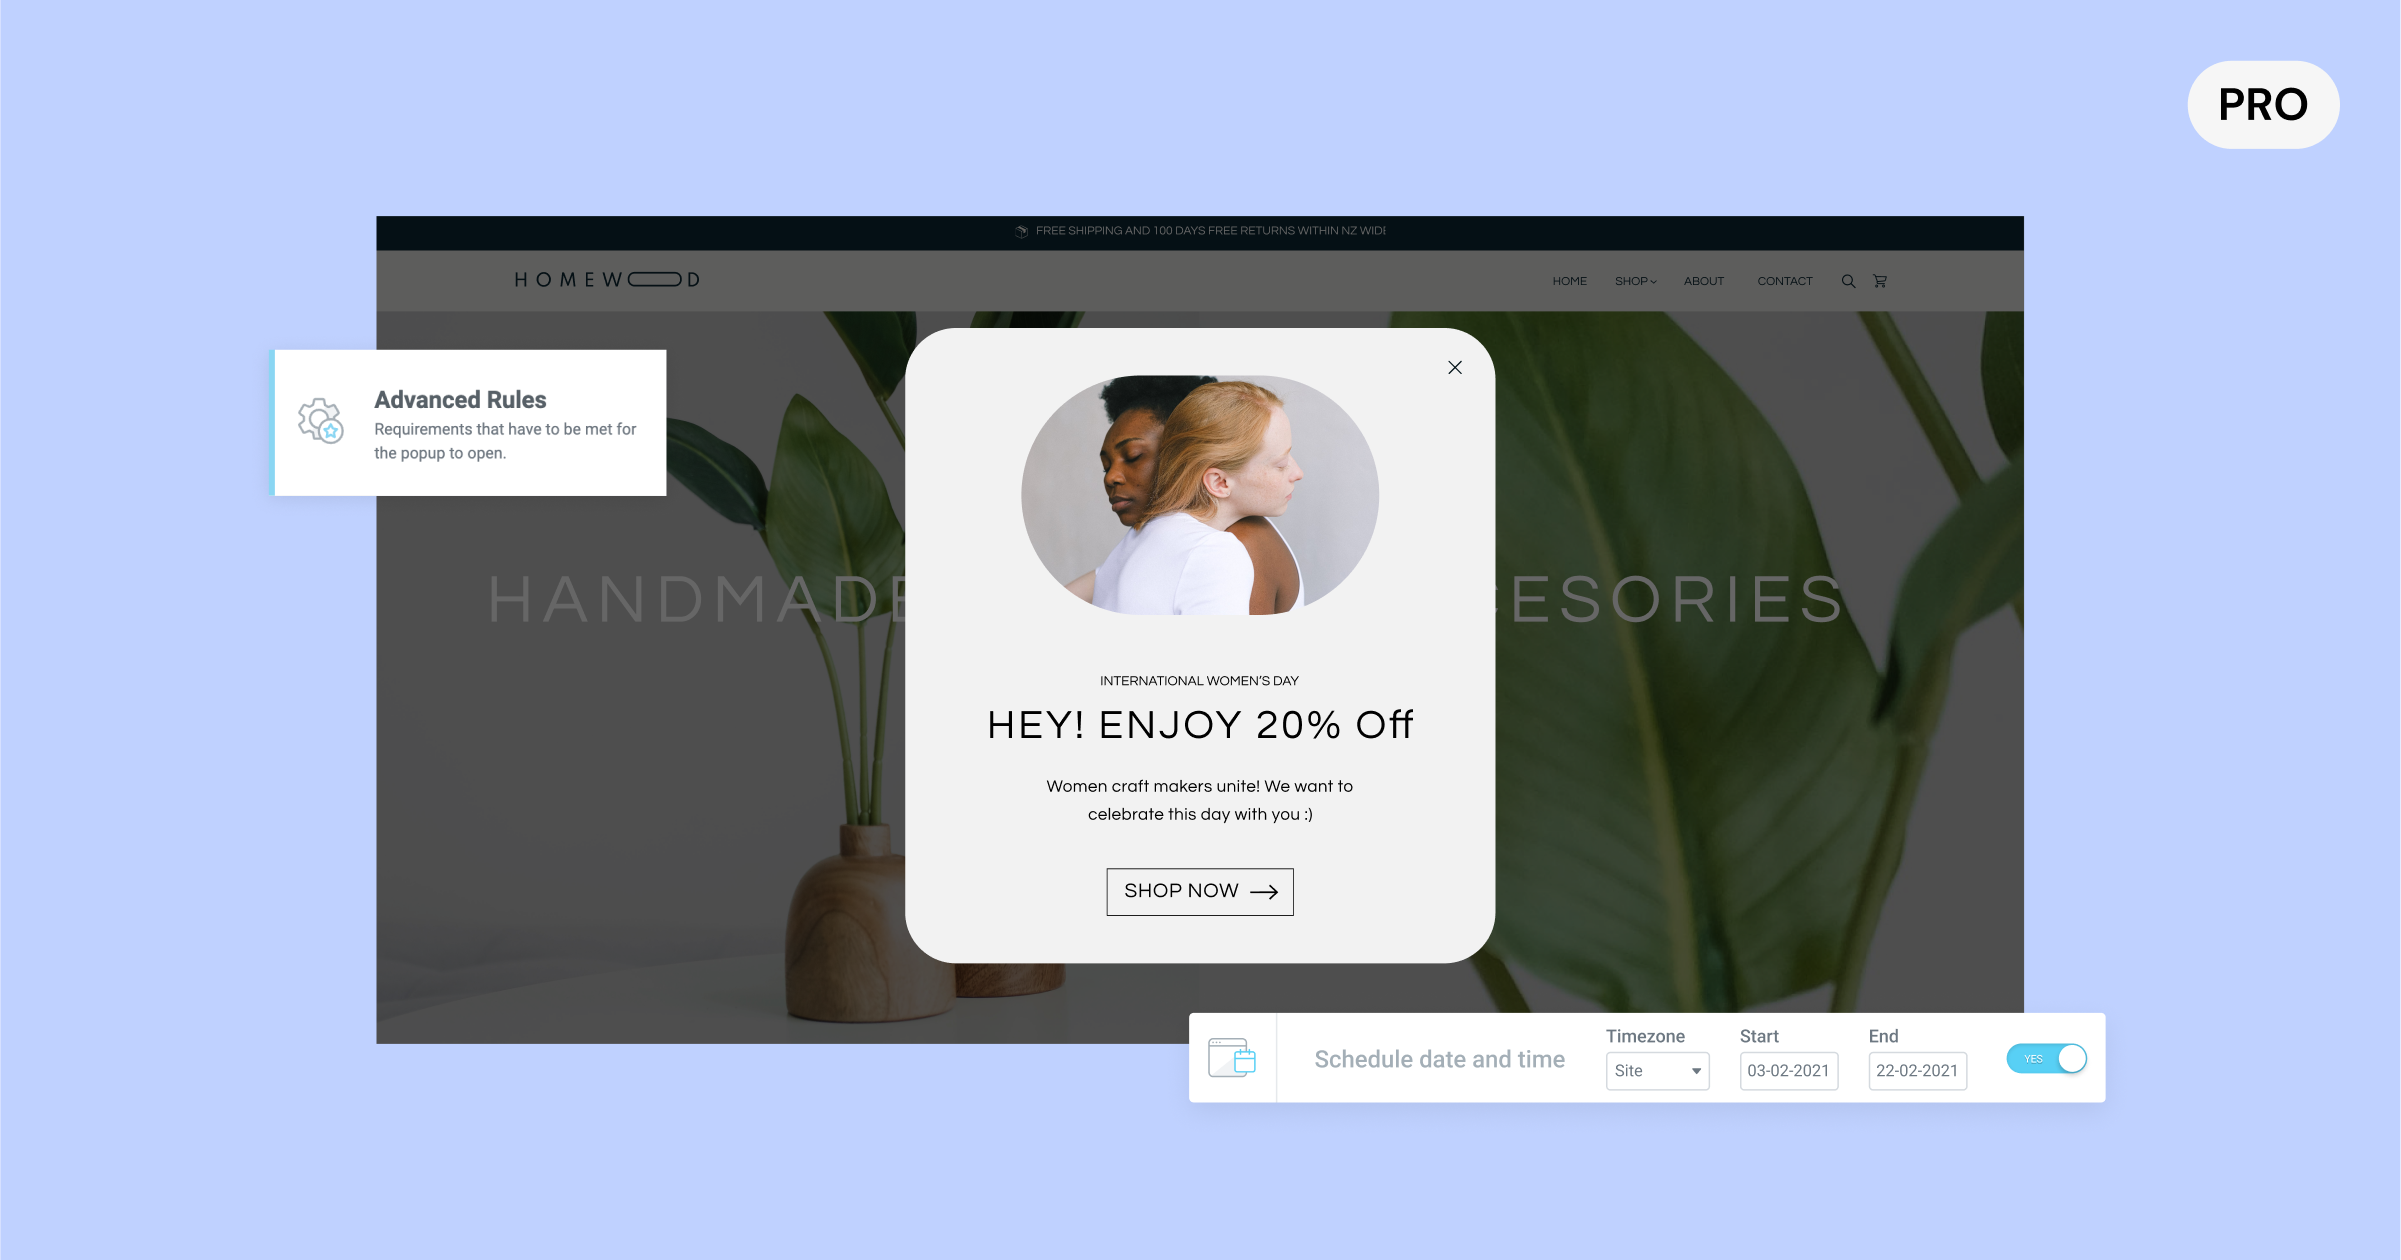
Want to display a promotion in a pop-up window for a given period? You can now accurately program when your pop-up windows need to display. Choose the date and time based on the time zone of your website, or even the time zone of your visitors.
Previously, you had to manually activate the pop-up window for the desired time range, and then remember to disable it when you were ready to delete it. Now you can schedule it in advance. For example, if you want to promote a campaign or holiday message in a contextual window, you can configure it in advance and stop automatically at the end of the campaign.
The new date and time parameter is found in the advanced rules of the pop-up window display condition and can be formulated with other triggers, display conditions and advanced rules to ensure that you send the most appropriate message to each visitor at any time and anywhere.
Additional updates
The Experience page of Elementor renowned in Features
The Elementor Features page, available from Elementor → Settings in the WP dashboard, replaced the previous page – Experiences. The purpose of this update is to clarify the status of the different features that you can manually activate or disable depending on your preferences.
Improvements in accessibility
Improving the accessibility of your website is essential to provide a positive user experience, and also has an impact on the lighthouse scores of your website. Elementor 3.11 includes a number of accessibility improvements in the following Pro features:
- Popups – Added the possibility to close the popup with the keyboard.
- Research Widgets – The full screen search widget mode is now available on the keyboard.
- Widget Post – Added a new `aria-label` to the ‘read more' link.
- Widget Flip Box – Added navigation support to the keyboard.
Improve the design of your website and visitor experience with these new features
With Elementor 3.11, you can improve the design of your website with the new Loop Carousel, improve your workflow with the new Copy & Paste Between Websites, and improve your visitors' experience with the new Popup Advanced Rule and accessibility improvements.
The continuous improvement of your websites and the introduction of new design concepts can increase the commitment of your visitors and keep your business at the forefront. Try these new features and tell us what you think in the comments.
This article was translated and slightly modified from the official blog of Elementor: https://elementor.com/blog/new-loop-carousel-copy-paste-between-websites-and-more/
